We are here to help! Submit a ticket and we'll get back to as soon as possible.
Submit ticketLet’s get you on the fast track to mastering the ScatterSpoke. When you log in for the first time, you will be surprised by how easy it is to grasp the foundations.
There are just a few steps you need to take to get started:
Let’s explore each of them.
The dashboard is your base of operations in ScatterSpoke. It keeps you focused on what matters most:

With all your critical information in one place, you always have a pulse on your team's improvement journey.
👉 Learn more about the Dashboard
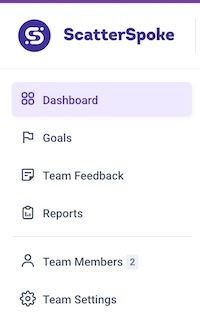
In addition, you have access to all of ScatterSpoke's major features from the left navigation menu.

All retrospectives in your ScatterSpoke account are visible to every user by default. You can easily create teams and invite team members to their respective team(s) to limit what they can see.

If you are part of more than one team in ScatterSpoke, you can easily navigate between them with just a couple of clicks from the dashboard.

To invite team members to ScatterSpoke, select one of your teams from the main dashboard and select the Invite option found in the three-dot menu located at the top right corner of the dashboard.

The Invite Team Member modal provides you with several options for adding people to the team:

Choose the one that meets your current needs and start inviting your team to ScatterSpoke using just their email address.
While your team is joining ScatterSpoke and taking their first look around, you can start collecting feedback by clicking on the “Feedback” dropdown button located in the top right corner of the dashboard.

From the menu you can setup Async Feedback or Create a Retrospective.
Using Async Feedback is a great way to quickly collect feedback from your team without an expensive and disruptive meeting.

If you already have a retrospective meeting scheduled, select Create Retrospective to create your first ScatterSpoke retro.
You can start from scratch by choosing Custom or select from our library of ready-made formats.

There are two styles available for ScatterSpoke retros:
As a rule of thumb, if your team is new to retrospectives, column retro boards are easier to start with and faster to get used to. This makes them a perfect choice for your first retrospective in ScatterSpoke!
Select a template, name your retrospective, click the “Create retrospective” button and you will be redirected to the Review Phase of your retrospective.

When your team is gathered and you're ready to start your retrospective, click the "Start retrospective" button in the top right corner.

There a couple ways to join a retrospective in ScatterSpoke.
You can join the latest retrospective from the Dashboard by clicking the "Current feedback" button in the top navigation menu.

Or you can go to the Feedback page to select from all feedback sessions available to you. To join, click into it and you will be redirected to the dedicated retro board.

Once everything is set and the team has gathered, you can start your first retrospective in ScatterSpoke and start on the path to continuous improvement.
To learn more about facilitating or participating in retros with ScatterSpoke, check out this dedicated guide on the topic.
©XXXX ScatterSpoke. All Rights Reserved.